How to Install OpenERP Odoo 8 on Ubuntu Server 14.04 LTS
![]()
Introduction
Welcome to the latest of our very popular OpenERP Odoo installation “How Tos”.
The new release of Odoo 8.0 is a major upgrade introducing a great many new features and a new name.
Odoo 8.0 is not only better looking and easier to use, it also brings many improvements to the existing feature-set and adds a number of brand new features which extend the scope of the business needs covered by Odoo. Ecommerce, CMS, Integrated BI…
Rather than me blathering on about what’s new, you can simply just go and read the release notes here.
The How To
Following that introduction, I bet you can’t wait to get your hands dirty…
Just one thing before we start: You can simply download a .deb (for Debian/Ubuntu type systems) or a. rpm (Redhat/CentOS) package of OpenERP and install that. Unfortunately that approach doesn’t provide us (Libertus Solutions) with enough fine-grained control over where things get installed, and it restricts our flexibility to modify & customise, hence I prefer to do it a slightly more manual way (this install process below should only take about 10-15 minutes once the host machine has been built).
This time, rather than using a source tarball as the basis for installation we are going to take the code straight from the Odoo 8.0 branch on Github. This should help when it comes to installing updates and bug fixes in the future by being able to issue a git pull command to update the code. Bear in mind before doing a pull request you should always have backups and you may need to update your Odoo database(s) as well.
So without further ado here we go:
Step 1. Build your server
I install just the bare minimum from the install routine (you may want to install the openssh-server during the install procedure or install subsequently depending on your needs).
After the server has restarted for the first time I install the openssh-server package (so we can connect to it remotely) and denyhosts
sudo apt-get install openssh-server denyhosts
UPDATE: Note that it seems denyhosts is no longer being maintained and is not in the main Ubuntu repository any more. I’m aware of a possibly suitable alternative called fail2ban but have not used it yet; do you own research. Thanks to Rami for the cluebat!
UPDATE2: Thanks to Paul for the pointer. I have added python-unicodecsv to the list of dependencies. Apparently this is required to correctly restore backups.
Now make sure your server has all the latest versions & patches by doing an update:
sudo apt-get update
sudo apt-get dist-upgrade
Although not always essential it’s probably a good idea to reboot your server now and make sure it all comes back up and you can login via ssh.
Now we’re ready to start the Odoo install.
Step 2. Create the Odoo user that will own and run the application
sudo adduser --system --home=/opt/odoo --group odoo
This is a “system†user. It is there to own and run the application, it isn’t supposed to be a person type user with a login etc. In Ubuntu, a system user gets a UID below 1000, has no shell (it’s actually /bin/false) and has logins disabled. Note that I’ve specified a “home†of /opt/odoo, this is where the OpenERP server code will reside and is created automatically by the command above. The location of the server code is your choice of course, but be aware that some of the instructions and configuration files below may need to be altered if you decide to install to a different location.
[Note: If you want to run multiple versions of Odoo/OpenERP on the same server, the way I do it is to create multiple users with the correct version number as part of the name, e.g. openerp70, openerp61 etc. If you also use this when creating the Postgres users too, you can have full separation of systems on the same server. I also use similarly named home directories, e.g. /opt/odoo80, /opt/openerp70, /opt/openerp61 and config and start-up/shutdown files. You will also need to configure different ports for each instance or else only the first will start.]
A question I have been asked a few times is how to run the Odoo server as the odoo system user from the command line if it has no shell. This can be done quite easily:
sudo su - odoo -s /bin/bash
This will su your current terminal login to the odoo user (the “-” between su and odoo is correct) and use the shell /bin/bash. When this command is run you will be in odoo’s home directory: /opt/odoo.
When you have done what you need you can leave the odoo user’s shell by typing exit.
Step 3. Install and configure the database server, PostgreSQL
sudo apt-get install postgresql
Then configure the Odoo user on postgres:
First change to the postgres user so we have the necessary privileges to configure the database.
sudo su - postgres
Now create a new database user. This is so Odoo has access rights to connect to PostgreSQL and to create and drop databases. Remember what your choice of password is here; you will need it later on:
createuser --createdb --username postgres --no-createrole --no-superuser --pwprompt odoo
Enter password for new role: ********
Enter it again: ********
Finally exit from the postgres user account:
exit
Step 4. Install the necessary Python libraries for the server
sudo apt-get install python-cups python-dateutil python-decorator python-docutils python-feedparser \

python-gdata python-geoip python-gevent python-imaging python-jinja2 python-ldap python-libxslt1

python-lxml python-mako python-mock python-openid python-passlib python-psutil python-psycopg2

python-pybabel python-pychart python-pydot python-pyparsing python-pypdf python-reportlab python-requests \

python-simplejson python-tz python-unicodecsv python-unittest2 python-vatnumber python-vobject \

python-werkzeug python-xlwt python-yaml wkhtmltopdf
With that done, all the dependencies for installing Odoo 8.0 are now satisfied (note that there are some changes between this and the packages required for OpenERP 7.0).
UPDATE & NOTE: It has been pointed out to me that the Qweb templating engine in Odoo 8 is warning that the version of wkhtmltopdf is too old. It turns out that Ubuntu 14.04 packages version 0.9.9 of this library even though this is rather old. To update your Ubuntu server please follow the instructions on this page. Many thanks to Ruben Kannan for pointing this out :-).
UPDATE & NOTE II: Zak suggests an alternative method to get and install the most recent version of wkhtmltopdf in this comment below. Thanks Zak.
UPDATE & NOTE III: David suggested adding python-cups and python-geoip to the list of modules to install in this comment below. Thanks David.
Step 5. Install the Odoo server
Install Git.
sudo apt-get install git
Switch to the Odoo user:
sudo su - odoo -s /bin/bash
Grab a copy of the most current Odoo 8 branch (Note the “.” at the end of this command!):
git clone https://www.github.com/odoo/odoo --depth 1 --branch 8.0 --single-branch .
(This might take a little while depending on the speed of your Internet connection.)
Note: Thanks to Ian Beardslee for the cluebat. Have now added --depth 1 to the command so it only retrieves the latest version without all the history. The download is now quite a bit quicker.
Once it’s finished exit from the odoo user: exit.
Step 6. Configuring the OpenERP application
The default configuration file for the server (/opt/odoo/debian/openerp-server.conf) is actually very minimal and will, with only a small change work fine so we’ll copy that file to where we need it and change it’s ownership and permissions:
sudo cp /opt/odoo/debian/openerp-server.conf /etc/odoo-server.conf

sudo chown odoo: /etc/odoo-server.conf

sudo chmod 640 /etc/odoo-server.conf
The above commands make the file owned and writeable only by the odoo user and group and only readable by odoo and root.
To allow the odoo server to run initially, you should only need to change two lines in this file. Toward to the top of the file change the line db_password = False to the same password you used back in step 3. Then modify the line addons_path = /usr/lib/python2.7/dist-packages/openerp/addons so that it reads addons_path = /opt/odoo/addons instead.
One other line we might as well add to the configuration file now, is to tell Odoo where to write its log file. To complement my suggested location below add the following line to the odoo-server.conf file:
logfile = /var/log/odoo/odoo-server.log
Use your favourite text editor here. I tend to use nano, e.g.
sudo nano /etc/odoo-server.conf
Once the configuration file is edited and saved, you can start the server just to check if it actually runs.
sudo su - odoo -s /bin/bash
/opt/odoo/openerp-server
If you end up with a few lines eventually saying OpenERP (Yes. The log still says OpenERP and not Odoo) is running and waiting for connections then you are all set.
If there are errors, you’ll need to go back and find out where the problem is.
Otherwise simply enter CTL+C to stop the server and then exit to leave the openerp user account and go back to your own shell.
Step 7. Installing the boot script
For the final step we need to install a script which will be used to start-up and shut down the server automatically and also run the application as the correct user. There is a script you can use in /opt/odoo/debian/init but this will need a few small modifications to work with the system installed the way I have described above. Here’s a link to the one I’ve already modified for Odoo version 8.
Similar to the configuration file, you need to either copy it or paste the contents of this script to a file in /etc/init.d/ and call it odoo-server. Once it is in the right place you will need to make it executable and owned by root:
sudo chmod 755 /etc/init.d/odoo-server
sudo chown root: /etc/init.d/odoo-server
In the configuration file there’s an entry for the server’s log file. We need to create that directory first so that the server has somewhere to log to and also we must make it writeable by the openerp user:
sudo mkdir /var/log/odoo
sudo chown odoo:root /var/log/odoo
Step 8. Testing the server
To start the Odoo server type:
sudo /etc/init.d/odoo-server start
You should now be able to view the logfile and see that the server has started.
less /var/log/odoo/odoo-server.log
If there are any problems starting the server you need to go back and check. There’s really no point ploughing on if the server doesn’t start…

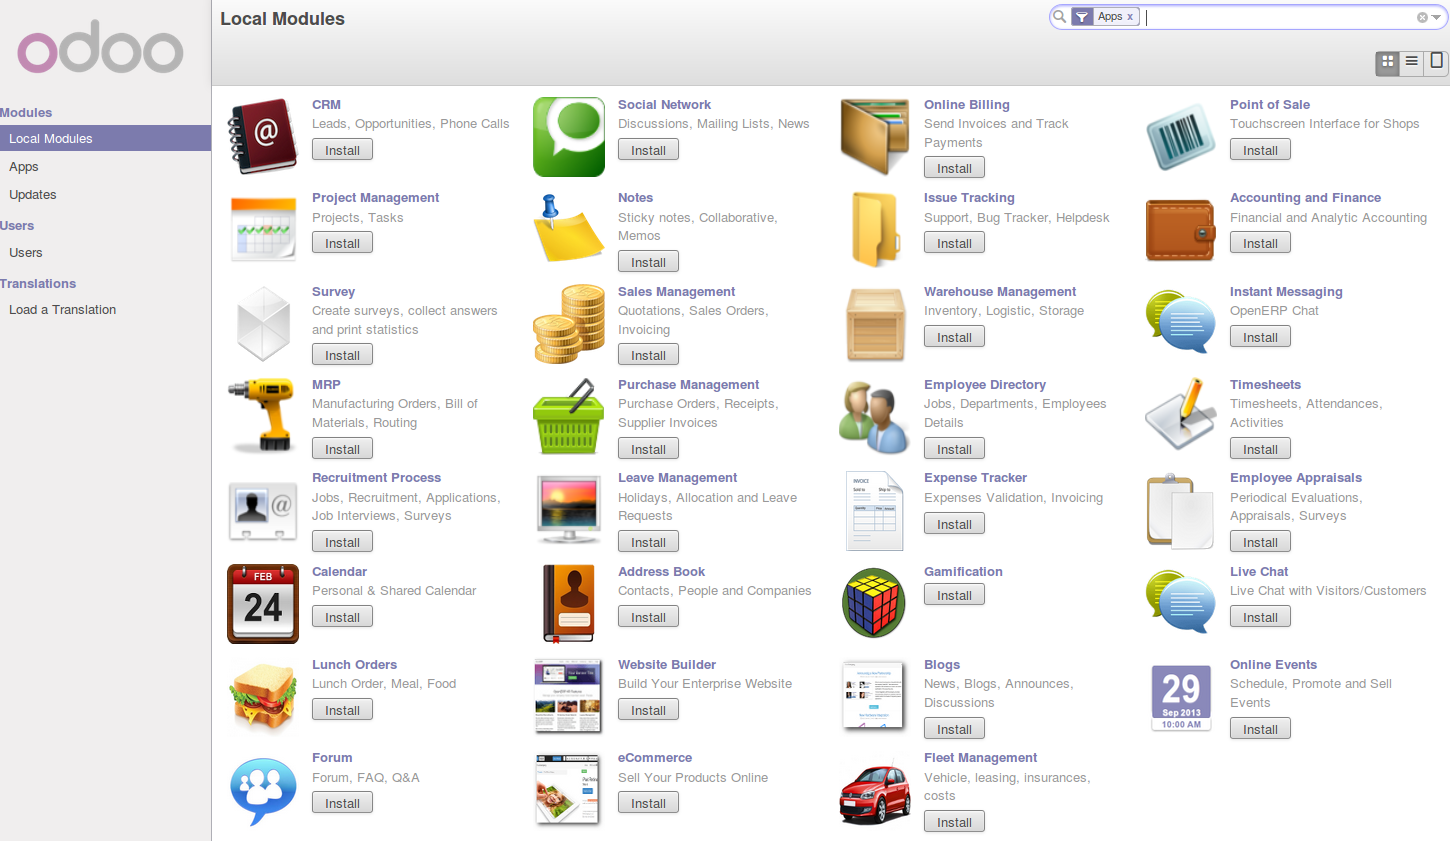
Odoo 8 New Database
If the log file looks OK, now point your web browser at the domain or IP address of your Odoo server (or localhost if you are on the same machine) and use port 8069. The url will look something like this:
http://IP_or_domain.com:8069
What you should see is a screen like this one (it is the Database Management Screen because you have no Odoo databases yet):
What I do recommend you do at this point is to change the super admin password to something nice and strong (Click the “Password” menu). By default this password is just “admin” and knowing that, a user can create, backup, restore and drop databases! This password is stored in plain text in the /etc/odoo-server.conf file; hence why we restricted access to just odoo and root. When you change and save the new password the /etc/odoo-server.conf file will be re-written and will have a lot more options in it.
Now it’s time to make sure the server stops properly too:
sudo /etc/init.d/odoo-server stop
Check the log file again to make sure it has stopped and/or look at your server’s process list.
Step 9. Automating Odoo startup and shutdown
If everything above seems to be working OK, the final step is make the script start and stop automatically with the Ubuntu Server. To do this type:
sudo update-rc.d odoo-server defaults
You can now try rebooting you server if you like. Odoo should be running by the time you log back in.
If you type ps aux | grep odoo you should see a line similar to this:
odoo 1491 0.1 10.6 207132 53596 ? Sl 22:23 0:02 python /opt/odoo/openerp-server -c /etc/odoo-server.conf
Which shows that the server is running. And of course you can check the logfile or visit the server from your web browser too.
Odoo 8 Opening Screen
That’s it! Next I would suggest you create a new database filling in the fields as desired. Once the database is initialised, you will be directed straight to the new main configuration screen which gives you a feel for the new User Interface in Odoo 8 and shows you how easy it is to set up a basic system.
How to install OpenERP 6.0 on Ubuntu 10.04 LTS Server (Part 1)
Update: 22/02/2012. OpenERP 6.1 was released today. I’ve written a howto for this new version here.
![]() Recently at work, we’ve been setting up several new instances of OpenERP for customers. Our server operating system of choice is Ubuntu 10.04 LTS.
Recently at work, we’ve been setting up several new instances of OpenERP for customers. Our server operating system of choice is Ubuntu 10.04 LTS.
Installing OpenERP isn’t really that hard, but having seen several other “How Tos” on-line describing various methods where none seemed to do the whole thing in what I consider to be “the right way”, I thought I’d explain how we do it. There are a few forum posts that I’ve come across where the advice is just plain wrong too, so do be careful.
As we tend to host OpenERP on servers that are connected to the big wide Internet, our objective is to end up with a system that is:
- A: Accessible only via encrypted (SSL) services from the GTK client, Web browser, WebDAV and CalDAV
- B: Readily upgradeable and customisable
One of my friends said to me recently, “surely it’s just sudo apt-get install openerp-server isn’t it?” Fair enough; this would actually work. But there are several problems I have with using a packaged implementation in this instance:
- Out-of-date. The latest packaged version I could see, in either the Ubuntu or Debian repositories, was 5.0.15. OpenERP is now at 6.0.3 and is a major upgrade from the 5.x series.
- Lack of control. Being a business application, with many configuration choices, it can be harder to tweak your way when the packager determined that one particular way was the “true path”.
- Upgrades and patches. Knowing how, where and why your OpenERP instance is installed the way it is, means you can decide when and how to update it and patch it, or add custom modifications.
So although the way I’m installing OpenERP below is manual, it gives us a much more fine-grained level of control. Without further ado then here is my way as it stands currently (“currently” because you can almost always improve things. HINT: suggestions for improvement gratefully accepted).
[Update 18/08/2011: I’ve updated this post for the new 6.0.3 release of OpenERP]
Step 1. Build your server
I install just the bare minimum from the install routine (you can install the openssh-server during the install procedure or install subsequently depending on your preference).
After the server has restarted for the first time I install the openssh-server package (so we can connect to it remotely) and denyhosts to add a degree of brute-force attack protection. There are other protection applications available: I’m not saying this one is the best, but it’s one that works and is easy to configure and manage. If you don’t already, it’s also worth looking at setting up key-based ssh access, rather than relying on passwords. This can also help to limit the potential of brute-force attacks. [NB: This isn’t a How To on securing your server…]
sudo apt-get install openssh-server denyhosts
Now make sure you are running all the latest patches by doing an update:
sudo apt-get update
sudo apt-get dist-upgrade
Although not always essential it’s probably a good idea to reboot your server now and make sure it all comes back up and you can still login via ssh.
Now we’re ready to start the OpenERP install.
Step 2. Create the OpenERP user that will own and run the application
sudo adduser --system --home=/opt/openerp --group openerp
This is a “system” user. It is there to own and run the application, it isn’t supposed to be a person type user with a login etc. In Ubuntu, a system user gets a UID below 1000, has no shell (well it’s actually /bin/false) and has logins disabled. Note that I’ve specified a “home” of /opt/openerp, this is where the OpenERP server, and optional web client, code will reside and is created automatically by the command above. The location of the server code is your choice of course, but be aware that some of the instructions and configuration files below may need to be altered if you decide to install to a different location.
Step 3. Install and configure the database server, PostgreSQL
sudo apt-get install postgresql
Then configure the OpenERP user on postgres:
First change to the postgres user so we have the necessary privileges to configure the database.
sudo su - postgres
Now create a new database user. This is so OpenERP has access rights to connect to PostgreSQL and to create and drop databases. Remember what your choice of password is here; you will need it later on:
createuser --createdb --username postgres --no-createrole --no-superuser --pwprompt openerp

    Enter password for new role: ********

    Enter it again: ********
[Update 18/08/2011: I have added the --no-superuser switch. There is no need for the openerp database user to have superuser privileges.]
Finally exit from the postgres user account:
exit
Step 4. Install the necessary Python libraries for the server
sudo apt-get install python python-psycopg2 python-reportlab \

     python-egenix-mxdatetime python-tz python-pychart python-mako \

     python-pydot python-lxml python-vobject python-yaml python-dateutil \

     python-pychart python-webdav
And if you plan to use the Web client install the following:
sudo apt-get install python-cherrypy3 python-formencode python-pybabel \

     python-simplejson python-pyparsing
Step 5. Install the OpenERP server, and optional web client, code
I tend to use wget for this sort of thing and I download the files to my home directory.
Make sure you get the latest version of the application files. At the time of writing this it’s 6.0.2 6.0.3; I got the download links from their download page.
wget http://www.openerp.com/download/stable/source/openerp-server-6.0.3.tar.gz
And if you want the web client:
wget http://www.openerp.com/download/stable/source/openerp-web-6.0.3.tar.gz
Now install the code where we need it: cd to the /opt/openerp/ directory and extract the tarball(s) there.
cd /opt/openerp

sudo tar xvf ~/openerp-server-6.0.3.tar.gz

sudo tar xvf ~/openerp-web-6.0.3.tar.gz
Next we need to change the ownership of all the the files to the openerp user and group.
sudo chown -R openerp: *
And finally, the way I have done this is to copy the server and web client directories to something with a simpler name so that the configuration files and boot scripts don’t need constant editing (I call them, rather unimaginatively, server and web). I started out using a symlink solution, but I found that when it comes to upgrading, it seems to make more sense to me to just keep a copy of the files in place and then overwrite them with the new code. This way you keep any custom or user-installed modules and reports etc. all in the right place.
sudo cp -a openerp-server-6.0.3 server

sudo cp -a openerp-web-6.0.3 web
As an example, should OpenERP 6.0.4 come out next, I can extract the tarballs into /opt/openerp/ as above. I can do any testing I need, then repeat the copy command (replacing 6.0.3 obviously) so that the modified files will overwrite as needed and any custom modules, report templates and such will be retained. Once satisfied the upgrade is stable, the older 6.0.3 directories can be removed if wanted.
That’s the OpenERP server and web client software installed. The last steps to a working system are to set up the two (server and web client) configuration files and associated init scripts so it all starts and stops automatically when the server boots and shuts down.
Step 6. Configuring the OpenERP application
The default configuration file for the server (in /opt/openerp/server/doc/) could really do with laying out a little better and a few more comments in my opinion. I’ve started to tidy up this config file a bit and here is a link to the one I’m using at the moment (with the obvious bits changed). You need to copy or paste the contents of this file into /etc/ and call the file openerp-server.conf. Then you should secure it by changing ownership and access as follows:
sudo chown openerp:root /etc/openerp-server.conf

sudo chmod 640 /etc/openerp-server.conf
The above commands make the file owned and writeable only by the openerp user and only readable by openerp and root.
To allow the OpenERP server to run initially, you should only need to change one line in this file. Toward to the top of the file change the line db_password = ******** to have the same password you used way back in step 3. Use your favourite text editor here. I tend to use nano, e.g. sudo nano /etc/openerp-server.conf
Once the config file is edited, you can start the server if you like just to check if it actually runs.
/opt/openerp/server/bin/openerp-server.py --config=/etc/openerp-server.conf
It won’t really work just yet as it isn’t running as the openerp user. It’s running as your normal user so it won’t be able to talk to the PostgreSQL database. Just type CTL+C to stop the server.
Step 7. Installing the boot script
For the final step we need to install a script which will be used to start-up and shut down the server automatically and also run the application as the correct user. Here’s a link to the one I’m using currently.
Similar to the config file, you need to either copy it or paste the contents of this script to a file in /etc/init.d/ and call it openerp-server. Once it is in the right place you will need to make it executable and owned by root:
sudo chmod 755 /etc/init.d/openerp-server

sudo chown root: /etc/init.d/openerp-server
In the config file there’s an entry for the server’s log file. We need to create that directory first so that the server has somewhere to log to and also we must make it writeable by the openerp user:
sudo mkdir /var/log/openerp

sudo chown openerp:root /var/log/openerp
Step 8. Testing the server
To start the OpenERP server type:
sudo /etc/init.d/openerp-server start
You should now be able to view the logfile and see that the server has started.
less /var/log/openerp/openerp-server.log
If there are any problems starting the server now you need to go back and check. There’s really no point ploughing on if the server doesn’t start…

OpenERP - First Login
If you now start up the GTK client and point it at your new server you should see a message like this:
Which is a good thing. It means the server is accepting connections and you do not have a database configured yet. I will leave configuring and setting up OpenERP as an exercise for the reader. This is a how to for installing the server. Not a how to on using and configuring OpenERP itself…
What I do recommend you do at this point is to change the super admin password to something nice and strong. By default it is “admin” and with that a user can create, backup, restore and drop databases (in the GTK client, go to the file menu and choose the Databases -> Administrator Password option to change it). This password is written as plain text into the /etc/openerp-server.conf file. Hence why we restricted access to just openerp and root.
One rather strange thing I’ve just realised is that when you change the super admin password and save it, OpenERP completely re-writes the config file. It removes all comments and scatters the configuration entries randomly throughout the file. I’m not sure as of now if this is by design or not.
Now it’s time to make sure the server stops properly too:
sudo /etc/init.d/openerp-server stop
Check the logfile again to make sure it has stopped and/or look at your server’s process list.
Step 9. Automating OpenERP startup and shutdown
If everything above seems to be working OK, the final step is make the script start and stop automatically with the Ubuntu Server. To do this type:
sudo update-rc.d openerp-server defaults
You can now try rebooting you server if you like. OpenERP should be running by the time you log back in.
If you type ps aux | grep openerp you should see a line similar to this:
openerp 708 3.8 5.8 181716 29668 ? Sl 21:05 0:00 python /opt/openerp/server/bin/openerp-server.py -c /etc/openerp-server.conf
Which shows that the server is running. And of course you can check the logfile or use the GTK client too.
Step 10. Configure and automate the Web Client
Although it’s called the web client, it’s really another server-type application which [ahem] serves OpenERP to users via a web browser instead of the GTK desktop client.
If you want to use the web client too, it’s basically just a repeat of steps 6, 7, 8 and 9.
The default configuration file for the web client (can also be found in /opt/openerp/web/doc/openerp-web.cfg) is laid out more nicely than the server one and should work as is when both the server and web client are installed on the same machine as we are doing here. I have changed one line to turn on error logging and point the file at our /var/log/openerp/ directory. For our installation, the file should reside in /etc/, be called openerp-web.conf and have it’s owner and access rights set as with the server configuration file:
sudo chown openerp:root /etc/openerp-web.conf

sudo chmod 640 /etc/openerp-web.conf
Here is a web client boot script. This needs to go into /etc/init.d/, be called openerp-web and be owned by root and executable.
sudo chmod 755 /etc/init.d/openerp-web

sudo chown root: /etc/init.d/openerp-web
You should now be able to start the web server by entering the following command:
sudo /etc/init.d/openerp-web start
Check the web client is running by looking in the log file, looking at the process log and, of course, connecting to your OpenERP server with a web browser. The web client by default runs on port 8080 so the URL to use is something like this: http://my-ip-or-domain:8080
Make sure the web client stops properly:
sudo /etc/init.d/openerp-web stop
And then configure it to start and stop automatically.
sudo update-rc.d openerp-web defaults
You should now be able to reboot your server and have the OpenERP server and web client start and stop automatically.
I think that will do for this post. It’s long enough as it is!
I’ll do a part 2 in a little while where I’ll cover using apache, ssl and mod_proxy to provide encrypted access to all services.
[UPDATE: Part 2 is here]
Another tale of Open Sourcery
Martyn, from Severn Delta Ltd, emailed me saying he had an Open Source story to tell. I’ve had this in my inbox for a while now, but have finally got round to publishing it.
Alan,
I own 50% of a manufacturing company in Bridgwater. When we bought the company out of receivership in ’03 we had no systems at all. Our former parent company was running a character based ERP system called MAX on Unix and a Windows file serving network.
So day 1 (ish!) we set up two RH servers and installed samba, sendmail, apache etc on one for file print intranet and email and the Linux port of MAX on the other.
See this post for some other detail.
http://blogs.severndelta.co.uk/?p=5
We have not been able to find a “right-sized” ERP solution for our needs to replace the ageing character based system (which had been “sunsetted” by infor in ’05). We also needed some form of CRM package to mange the growth of the company once we had moved into our new building in ’05.
So…. we decided to develop our own system in combination with an open source CRM package from a company called Senokian Solutions (http://www.senokian.com) called EGS.
EGS is PHP/Ajax based and runs against PostgreSQL. It also has its own development framework based on MVC that allows you to add modules. EGS 2.0 core has CRM, Project Management, Ticketing modules and a framework that allows for integrated e-commerce apps and site content management. It is free and open source.
The tools on which the system is built are:
Linux (Ubuntu)
Apache
PostgreSQL
PHP 5
Ajax
Smarty Template Engine
EZ pdf
XML/SWF ChartsIn November 2006 I took on a developer, Dave Easeman, to help code the accounts/ERP system as I specified it – we are now 99% of the way through – although I guess we will never finish the project! We are about to go live (Jan 1st) and then the aim is to polish everything up in Quarter 1/2 2009.
See here for a link on our blog
http://blogs.severndelta.co.uk/?p=58Maybe what I’ll do is update you as we progress to “go live” on Jan 1.
Regards
Martyn Shiner
Financial Director
Severn Delta Limited
Thanks for the story Martyn, it’s very encouraging how companies such as yours (i.e. not some global enterprise with billions of dollars in the bank) are able to deploy, manage, run and develop their own IT systems using FOSS. This is a great example of just how flexible and accessible FOSS really is.
I love this quote (from the first blog link):
I will never buy a Windows based PC ever again.
Are you listening Bill?
That was written in August last year. I’m interested if you have managed to stick to that goal Martyn?
Good luck with your deployment. I genuinely hope it goes well, and please do keep us updated on your progress. You seem to have a similar tenacity to Adrian Steele at Mercian Labels who has also been blogging about their own migration to FOSS. And they also developed a core application from scratch too – for them it was a CRM/MIS app.

