Siemens Gigaset 685IP Phones and Asterisk Review
[Update and Introduction: This article was originally posted on the 27th April 2008. I am still using the phones and am very happy with them indeed. I have had no operational problems to speak of. I make this updated comment because this is still a very popular article and new visitors read this daily but the date is only shown at the bottom.]
Last week I purchased a triple set of the brand new Siemens S685IP telephones. This is a DECT home telephone system with support for both PSTN and VOIP services. I’d spent quite some time looking for a decent replacement for our aging and now unreliable existing DECT handsets.
I bought these from a UK based on-line telephone vendor DSTelecom and their service and price was very good. I’d been waiting for this model to become available for a couple of months and they were offering the best price and the were first to get them in stock too!
There were a few reasons I selected these Siemens phones, but the main one is their ability to act as a basic telephone switch between handsets and incoming services. The Base unit can support up to 8 incoming services: 1 x PSTN, 1 x Gigaset VOIP Network, and 6 further VOIP (SIP) services.
This is the latest release and the handsets support very high quality voice between each other and on compatible networks. They also support Bluetooth so you can use a wireless headset and upload/download your mobile phone’s address book etc.
Here’s my personal review of these new phones for use in our home network. (Just click on the thumbnails for bigger images)
My initial impressions: Nice packaging and a good looking handset.
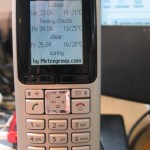
There are very easy to follow 1st time instructions that get the system installed and running. Once I’d plugged the phones in and got them charging, and base station in to the LAN, the phone started showing me the weather forecast in Lisbon! 🙂
Once the physical install is done, you can do almost everything else from the web based interface of the base station. I’ll cover that in detail in a minute.
But first the handsets. When you get them you need to do a first time charge and discharge cycle. The batteries are supplied (a pair of AAA rechargeables). The first full charge took between 3 and 5 hours depending on the handset. To discharge them all, I made internal calls between the phones and put them all on handsfree. It took a good 8-10 hours for them to get fully discharged. So talk-time is excellent.
The first thing my wife commented on when we were talking internally was the voice quality. She said it was brilliant! And having now just had a conversation with her somewhat hard-of-hearing father, he also attested to the much better sound than our previous telephones. So that’s good!
They have a nice big colour screen where you can – apparently although I haven’t done this yet – add pictures to your directory so the phone shows the caller’s face or avatar when ringing.
Anyway, all-in-all my initial impressions of the system was very positive indeed. Now let’s look at how the whole DECT/VOIP thing is configured and what really makes these stand out for a home phone…
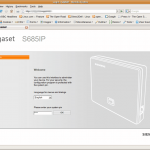
Accessing the Web based user interface was easy. Here’s the login screen you first see:
Due to the way I have our home network set-up, I used a static IP address for the base unit. It also supports DHCP however.
Next is to configure some VOIP service providers. For me it’s my Asterisk server… Only one change seemed to be needed to get the registration to work: Add subscribemwi=yes to your sip.conf. I’m not actually sure if this made any difference, as I think I didn’t click the “Active” box first time round. But apparently this setting is needed to get the message waiting light working properly when you are using Asterisk’s voice-mail anyway.
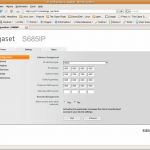
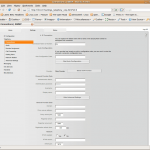
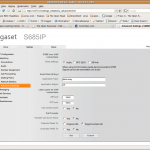
You configure the details for each service by clicking the “Edit” button. Here’s a default screen showing most of the options.
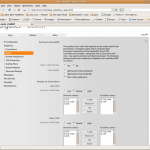
The next section allows you to select the codecs you’d like each service to support and their priority. As you can see again, it’s a simple, clean and easy-to-understand interface.
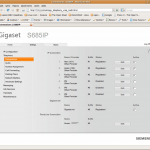
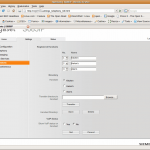
After that, you are ready to choose which handsets work with what services. I configured my handsets first to give them meaningful names: “Alan’s, Helen’s and Kitchen”. Note also you can upload/download your handset’s directory from here too. The directory needs to be in vcard format. I haven’t done this yet but I can’t see any major obstacles apart from the time it will take to get a csv spreadsheet into vcard.
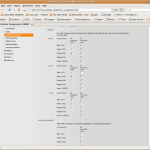
This is, for me at least, the coolest feature. From this screen, you can choose which handset rings depending on the service it is coming in on. And you can decide which calls use the built-in answer machine and which do not. It’s basic switch functionality and when you stick Asterisk behind this you have a really flexible solution to handling multiple incoming lines and different types of users.
My wife and I both run our respective businesses from our home offices. Now we have individual incoming VOIP lines into Asterisk plus the home PSTN service. Calls for my business ring, my phone and the kitchen phone. Calls for Helen’s ring her phone and the kitchen phone. Neither uses the Siemens Answer machine but the features of Asterisk’s voice-mail system. Calls for the family ring all three phones and use the built-in answering machine. You can configure this any way you wish basically.
Now we have a basic phone system set-up there are various add-on features to play with 😉
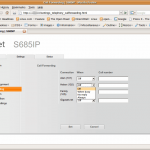
Here is the call forwarding screen where for each service you can decide what to do under certain conditions: “When Busy, No Reply or Always”. Simple but this is a home telephone system.
Next, you have a section for creating dialling plans. You have here, the ability to choose which service gets used for particular number sequences. So, for example, you could put in the international prefix for Australia and only allow numbers with that prefix to go via a particular VOIP service. You can also block certain number sequences completely too.
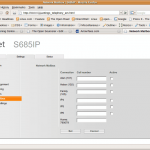
The Network Mailbox screen allows you to configure the voice-mail service for each provider. So for Asterisk that will be the numbers configured in voicemail.conf. This enables the service to work with the handsets so you get message waiting indications and access to the mailbox without needing to know the mailbox number.
Also in the Telephony section of the configuration tree is an “Advanced Settings” screen. This lets you configure the way DTMF tones are handled, SIP and RTP port numbering and a few other odds and sods.
That’s it for the telephony section. Comprehensive, easy-to-use and nicely laid out.
The next area is “Messaging”. The handsets support SMS type texting and there is an option to configure a jabber server (IM). The Siemens Gigaset VOIP network, which you get automatically subscribed too when you buy your phone is the default configuration, but you can change it to your favourite IM network should you wish. Not being a big user of either SMS or IM I haven’t used this. Maybe one of my kids will show me later!
Also under the Messaging section you can configure a POP3 email server. It is for the network, not per handset so I am not sure of it’s value. I suppose for a family who have a single email account it might be useful. But this feature doesn’t really do it for me. If it was per handset or per network service it would make far more sense.
After Messaging come the last few configuration pages.
The first is called “Info Services” and you can, via the Gigaset Network, configure a few somewhat limited network based information feeds. You can enter an RSS feed, or choose a weather forecasting service. The weather seemed more useful for me so I set it to show me the weather for London for the next three days.
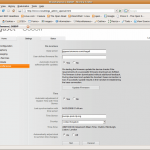
The final screen is the ubiquitous “Miscellaneous” settings. Here you can update the firmware directly from Siemens or use a locally stored file. You also get to choose the NTP server for the clock and whether to automatically deal with daylight saving time changes.
That’s the Siemens S685IP phone system. Having had them running for a few days now, I’m very pleased. Everything has worked, call quality is excellent, ease-of-use is superb.
I have come up with a couple of tricks I’d like Siemens to do that would really enhance the overall functionality however. Two are to do with time. And as there is an accurate and network-synchronised clock in the base station, I can’t see this being terribly hard to do to be honest.
- Use the in-built clock to allow you to configure different network connection settings. So, for example, after 6pm, If a call comes in my office number I might not want it to ring the other (our kitchen or family) phone. Perhaps during a weekend also.
- Ditto with call forwarding. After 6pm or during weekends forward calls to my mobile for example…
- Ditto with the dial plans. Being able to route certain type of call via different networks is great, but being able to choose to do it during certain hours would be even better…
- The email and IM features are nice but in my opinion they would be far more useful if it was configurable based on per handset or service basis rather than a single account for all devices.
- Also to do with the email feature; I’d like the option of IMAP as well as POP3.
I’m sure there will be some other ideas that will crop up have as we get used to them, but all-in-all my first impressions are that this is an absolutely cracking phone system for home and small business. When you use this with Asterisk of course, they get even better. Some of the time based features could possibly be got around by some fiddling with Asterisk. If I get chance to work something out I’ll write it up here.


